Editing a node
- Navigate to the node you want to edit or find your content using the content overview.
- Click the Edit tab near the top of the page to enter the editing interface for that node.
- Make the necessary changes to the appropriate field(s); these may be labeled Title, Body, Description, etc. and will vary depending on the content type that was used to create the node you are working with.
- Click Save at the bottom of the page
Note that certain fields allow text formatting; you can use the icons in the toolbar to make style changes to your content — such as make text bold or italic, add bulleted or numbered lists, change the text alignment, etc. See Working with the text editor for full editing instructions.
The editing interface
Once you have found your content, you can edit by either clicking the Edit button from the content overview page, or by clicking the Edit tab on the node itself when you are viewing it. The editing interface for a node has a number of common elements across all types of nodes, as well as unique fields that are specific to a given content type. The common elements are shown below:
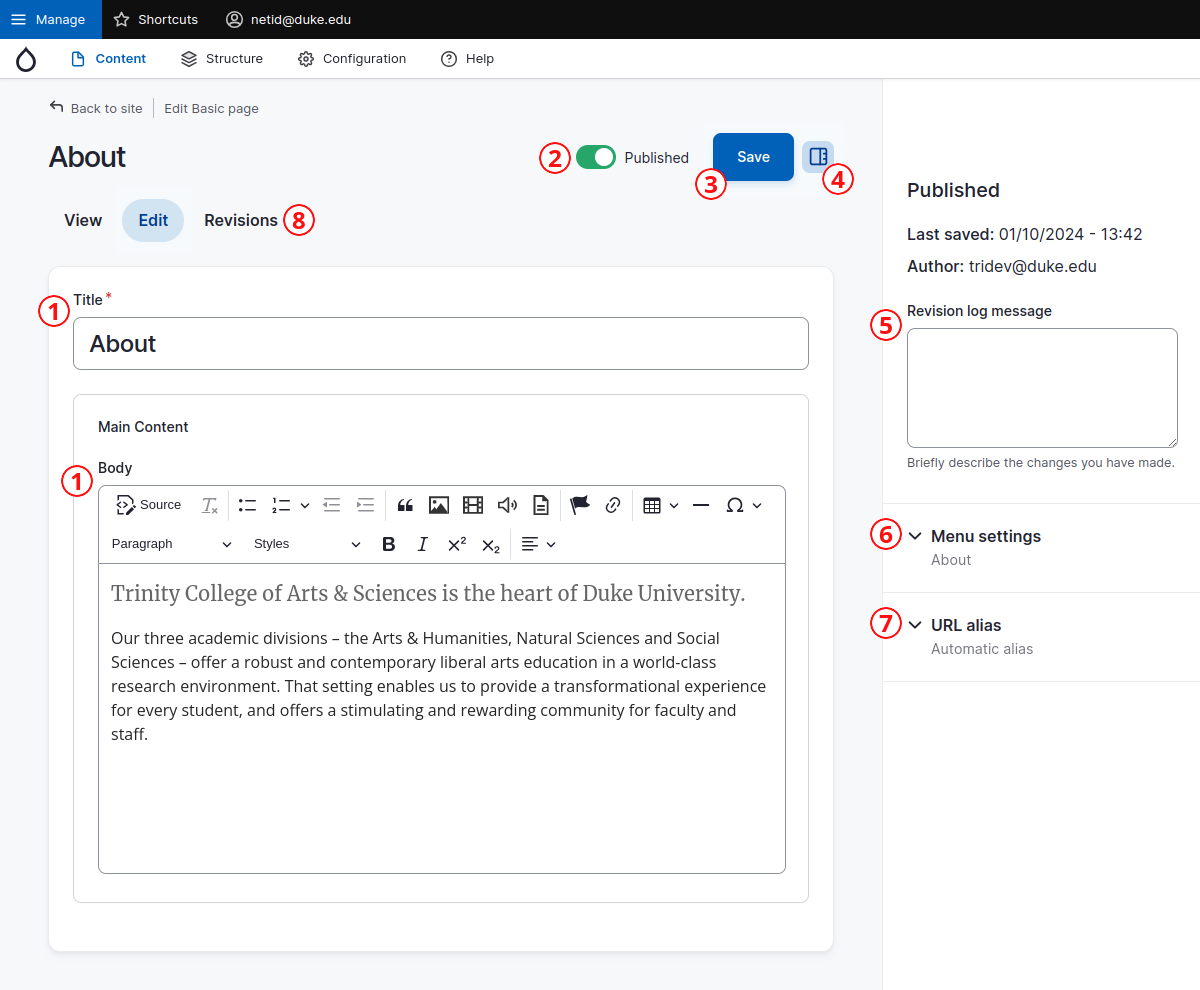
- The fields present will vary depending on the content type that was used to create the node you are working with; in this example a Basic page is shown, which includes a title and a body field.
- Published status: Use this checkbox to publish (when checked) or unpublish content. Learn more about changing the published status of a node.
- Click the Save button to commit any changes; failure to do so when you are finished editing will result in data loss.
- Sidebar toggle: Click to hide/show the right-hand sidebar with the revision status, Menu settings, URL alias, etc.
- Revision log message: Before saving, enter an optional description of what changes were made and why.
- The Menu settings are used to provide a menu item to the node in the site navigation (or menu).
- URL alias can be used to customize the alias (also referred to as path) the user sees in their browser’s address bar. For example, given the URL http://duke.edu/page-path, page-path is the alias.
- The Revisions tab provides a list of versions for the current node.
Note: Several content types are used to create nodes by importing content from external sources such as the Duke Events Calendar, Scholars@Duke, and the main Trinity College of Arts & Sciences website. These content types include fields which house the imported data, but also have fields that house locally-managed data that can be used to augment or override certain aspects of the imported content. For more information on this topic, please see Imported vs. local data.